Table of Contents
TL;DR
If your VR headset looks blurry and also makes you dizzy, the cause is usually a fixable combo of incorrect IPD alignment, poor “sweet spot” fit/eye relief, and performance issues like reprojection artifacts—not a “bad headset.” This guide walks through a fast symptom checklist (blur, eye strain, nausea, double vision, headaches, edge clarity issues), explains how pancake vs Fresnel lenses can change perceived clarity and glare, and gives 7 step-by-step tweaks that reliably sharpen the image and improve comfort. It also shares a practical motion-sickness routine (short sessions, comfort locomotion, stable refresh targets) so you can build VR tolerance without forcing it.
Introduction: VR Headset
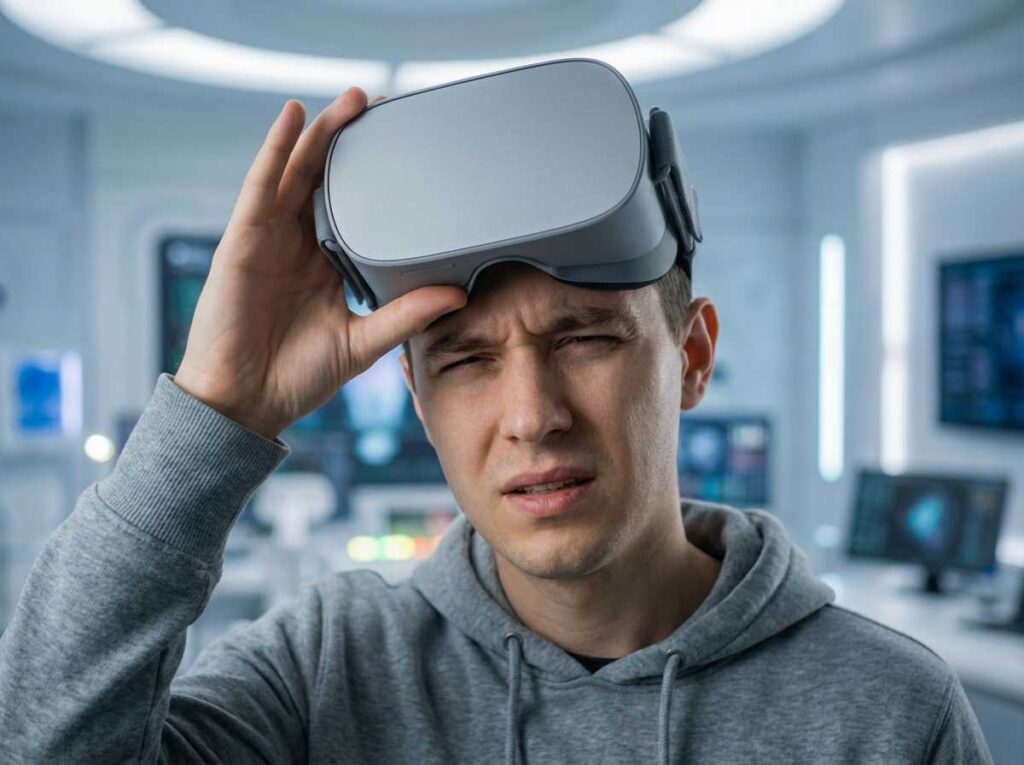
If your VR headset blurry problem comes with dizziness, nausea, or headaches, it’s rarely “just how VR is.” Most of the time it’s a mismatch between your eyes, the headset’s optics, and a few key settings that quietly sabotage comfort.
This guide breaks down (1) a quick symptom checklist, (2) what’s actually happening (in plain language), (3) pancake vs Fresnel lenses and why they feel different, and (4) the 7 fixes that consistently turn a “I can’t last 10 minutes” headset into a “two-hour session” headset.
Symptom checklist
Before changing settings, identify which “bucket” you’re in—because a VR headset blurry complaint can mean three totally different things.
- Blur in the center (text never gets sharp, even when you stare straight ahead).
- Blur on the edges (center sharp, but edges smear or warp).
- Eye strain (tired eyes, pressure behind the eyes, need to squint).
- Nausea / motion sickness (especially with smooth locomotion or smooth turning).
- “Double image” (feels like your eyes can’t fuse the picture; sometimes comes with dizziness).
- Headaches (often after 10–30 minutes).
- Poor “sweet spot” tolerance (image looks great for 5 seconds, then goes soft when the headset shifts slightly).
Personal buying note: the first time a headset made me feel “off,” I assumed the headset was defective. Later, it became obvious the “defect” was usually setup—especially IPD + fit + refresh rate stability—so now those are checked before blaming the hardware.
What’s really happening
IPD mismatch (your eyes vs lens spacing)
IPD (interpupillary distance) is the distance between the centers of your pupils, and if the headset lenses aren’t aligned to that spacing, clarity and comfort suffer. HTC’s IPD guide explains that accurate IPD helps you get a clear image and reduce eye strain, and misalignment is a common cause of blurry images, dizziness, and eye strain.
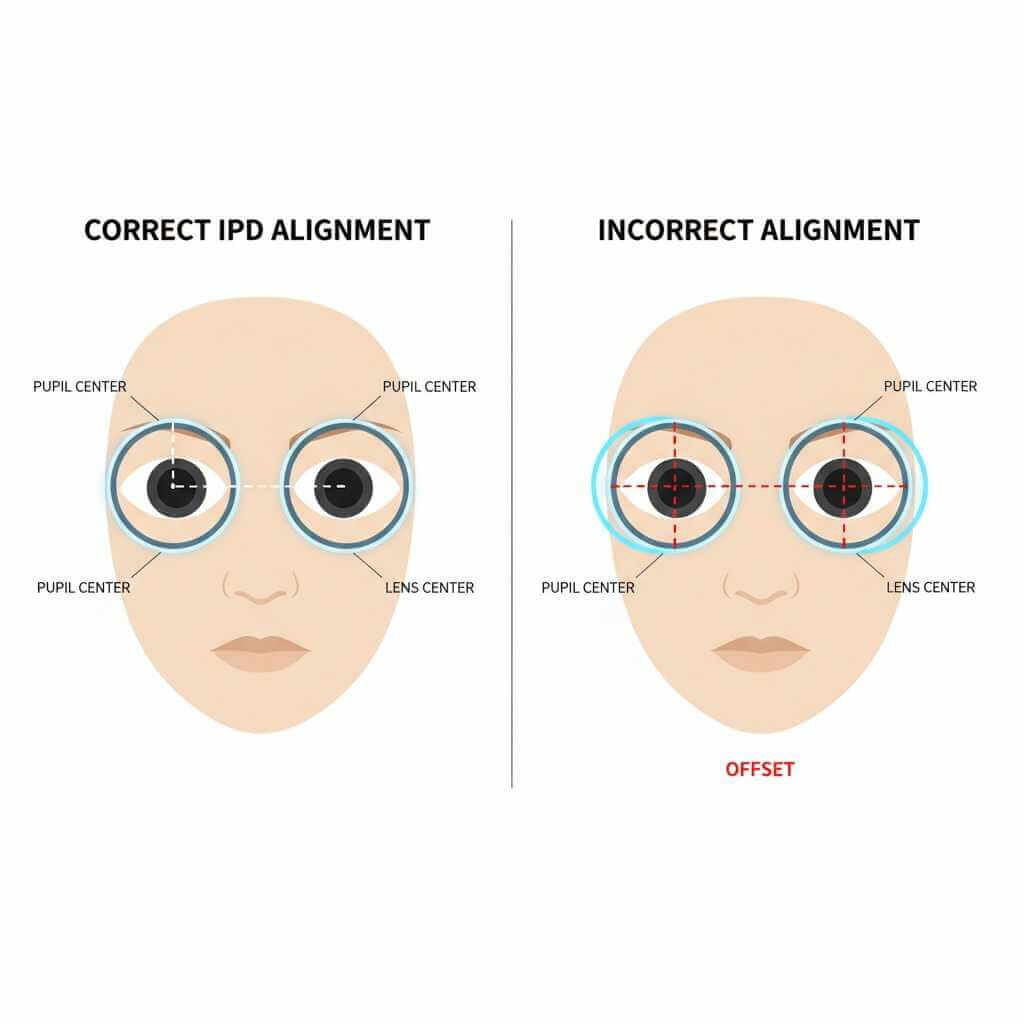
How it feels in real life: one eye looks “kind of okay,” the other never quite locks in, and your brain does extra work to fuse the image—leading to fatigue, headaches, or that “something’s wrong” feeling.
Wrong facial interface distance (eye relief)
Even with perfect IPD, you can still be outside the lens’ best focus zone if your eyes are too close or too far from the lenses. This is common when:
- You changed the face pad (thicker/thinner).
- You tightened the strap so hard the headset rides too high.
- You wear glasses and the headset is forced forward.
How it feels: the center almost sharpens, but never snaps into crisp focus; edges can get worse.
Missing the optics “sweet spot”
The sweet spot is the alignment zone where the lens looks sharpest. If you’re slightly too high/low/tilted, text can blur instantly.
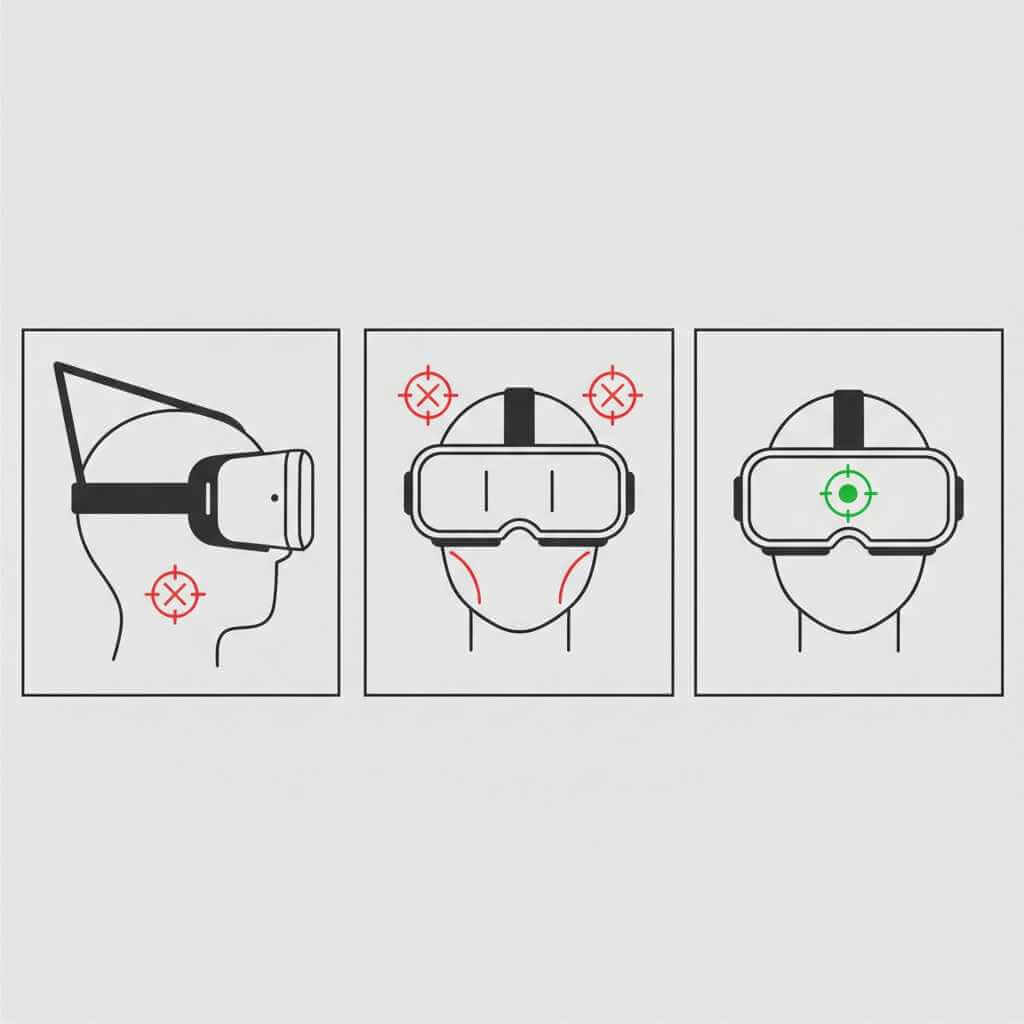
How it feels: you keep re-positioning the headset, and the clarity comes and goes as the headset shifts.
Too-low refresh rate (or unstable frame timing)
Refresh rate and frame stability matter more than people expect. If your eyes see motion that doesn’t match what your inner ear feels—especially with stutters—you can get nausea fast.
How it feels: you’re fine in menus, but movement (turning, strafing, driving) triggers sickness.
Reprojection artifacts (ghosting/warping that looks like blur)
When a PC or headset can’t hit target performance, VR systems may synthesize frames (reprojection/motion smoothing). Microsoft’s SteamVR/WMR documentation explains that with motion reprojection enabled, apps can render at half frame rate (e.g., 45 fps instead of 90 fps) while the system extrapolates frames, and it also lists expected visual artifacts like temporary warping/distortion on sharp edges or HUD text.
How it feels: the image isn’t just “soft”—it can look like moving objects smear, wobble, or leave trails when you turn your head.
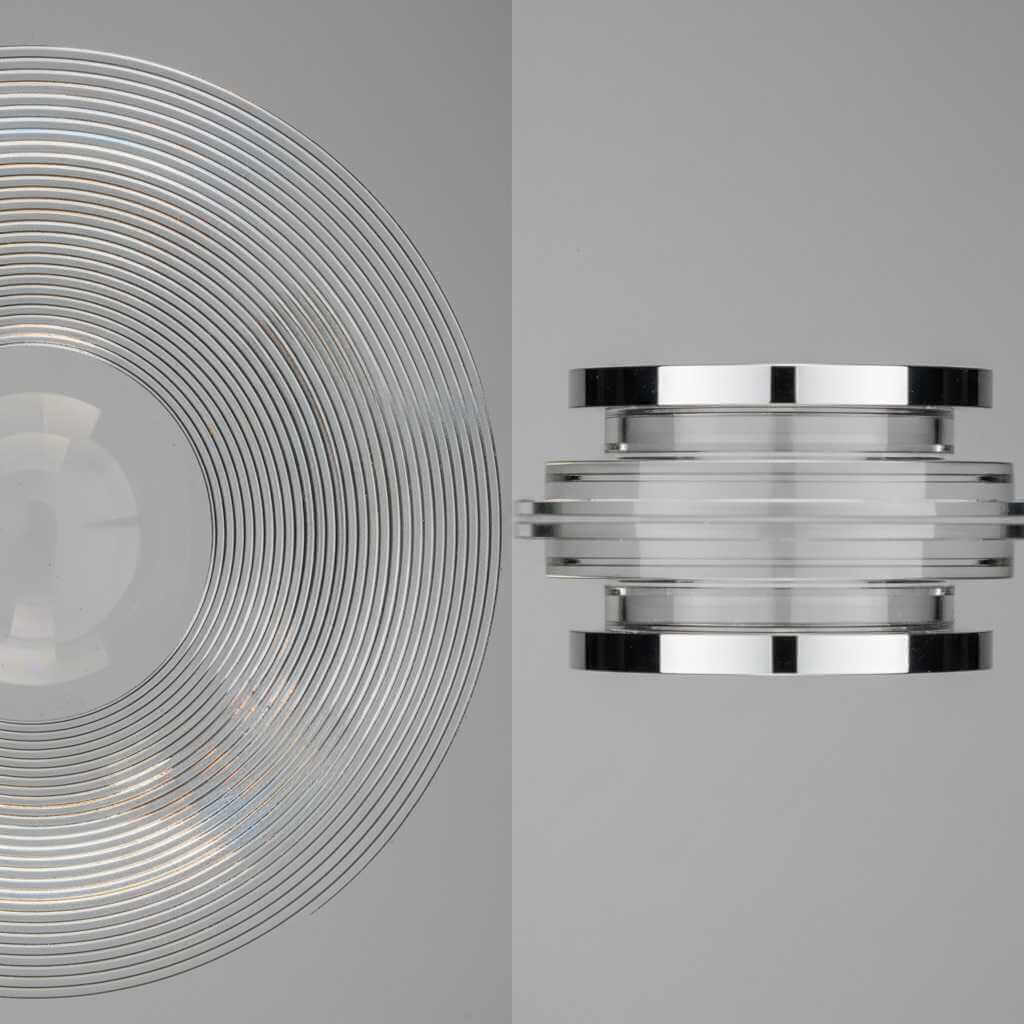
Pancake vs Fresnel lenses (why they change clarity and comfort)
When people say “this headset looks clearer,” they often mean the lens behavior is better for their face shape and eyes—not just that the display has more pixels.
Here’s the practical difference:
- Fresnel lenses are common in many classic VR headsets and can offer a wide field of view, but they’re more prone to things like chromatic aberration and require distortion correction.
- Pancake lenses “fold” the optical path so the headset can be slimmer, and the reduced eye-to-display distance can help enable thinner/lighter designs; VRX describes pancake optics as folding/bouncing light internally to slim the required distance between eyes and display.
Lens comparison table
| Feature | Fresnel lenses | Pancake lenses |
|---|---|---|
| Headset size/feel | Typically bulkier due to optics needing more space. | Often slimmer because the optical path is folded. |
| Common visual complaints | God rays / rings, edge issues, chromatic aberration, “sweet spot” sensitivity. | Can look cleaner, but can have tradeoffs like reduced light efficiency (dimmer image). |
| Who usually benefits most | Users who tolerate a smaller sweet spot and don’t mind some glare artifacts. | Users sensitive to glare/clarity and who prioritize comfort/compactness. |
Personal buying note: after using both lens styles, the decision became less about “best headset overall” and more about “which optical compromises bother me least.” That’s the mindset that prevents expensive buyer’s remorse.
The 7 fixes that actually solve “VR headset blurry”
These are ordered from “most likely to fix it quickly” to “more advanced tuning.”
Fix 1) Set IPD the right way (not the lazy way)
If your headset has an IPD slider/dial, treat it like prescription alignment, not a “close enough” setting.
Step-by-step
- Put on the headset and open a screen with crisp text (settings menu works well).
- Close one eye, then the other: check if one eye is sharper than the other.
- Adjust IPD slowly until both eyes look equally sharp.
- Re-check after tightening the strap (fit changes alignment).
For a concrete reference, HTC’s instructions describe using the IPD knob and focusing on text/lines while adjusting until clarity is best.
My real-world habit: once the “best” IPD is found, that number gets saved in notes. Any time a friend tries the headset, it’s returned to that number afterward—because even small changes can bring back the VR headset blurry feeling.
Fix 2) Re-fit the headset to hit the sweet spot (it’s mostly tilt, not tightness)
Most people overtighten the strap, which pins the headset in a slightly wrong position and shrinks the sweet spot.
Step-by-step
- Loosen straps more than you think you need.
- Hold the headset to your face with your hands first.
- While looking at small text, tilt the headset slightly up/down until it “snaps” sharp.
- Only then tighten straps enough to hold that exact angle.
Quick tip: If the top strap is too short, the headset rides high and you look through the wrong part of the lens—instant blur.
Fix 3) Adjust facial interface / eye relief (especially if you changed pads)
If your headset supports lens distance adjustment, or if you swapped to a thicker/thinner facial interface, you changed optics geometry.
Step-by-step
- If you use glasses: ensure the headset isn’t being pushed forward or angled incorrectly.
- Try the stock face pad again (baseline test).
- If the headset has eye relief adjustment: move the lenses slightly farther away if you see edge distortion or feel cross-eyed; move closer if you need more FOV and the center is already stable.
This is the “hidden” reason many people upgrade straps or face pads and then suddenly complain their VR headset blurry issue “came back.”
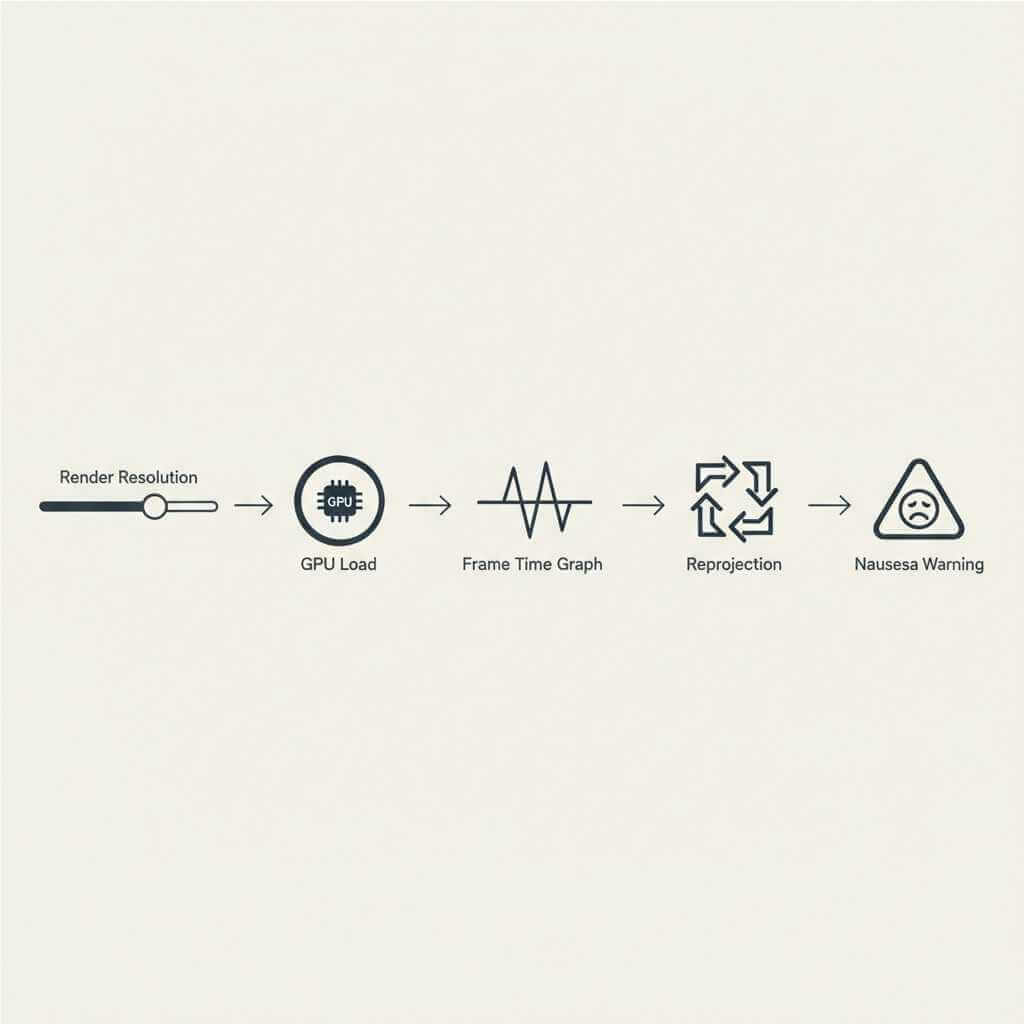
Fix 4) Lock performance before raising resolution (PCVR reality check)
Increasing resolution feels like the obvious fix for blur—until it triggers stutters, reprojection, and nausea.
If you’re using SteamVR with WMR, Microsoft specifically notes that higher resolution multipliers put more strain on the PC and recommends readjusting if performance degrades.
Step-by-step
- Start at default resolution scaling.
- Confirm your game is stable (no spikes/stutters).
- Increase resolution in small steps (10–20%).
- If nausea increases, roll back—because you likely triggered instability.
Personal experience: the biggest comfort improvement often came from reducing resolution to stabilize frame timing, not raising it to chase sharpness.
Fix 5) Pick a refresh rate you can actually sustain
A high refresh rate is great—until your hardware can’t hold it consistently.
Step-by-step
- Choose a refresh rate you can maintain in gameplay, not just in menus.
- If you notice shimmer/ghosting when turning, consider that reprojection may be kicking in.
- Reduce in-game settings (shadows, AA, render scale) until movement feels “buttery.”
Microsoft’s SteamVR/WMR guide explains that motion reprojection can run apps at half frame rate to maintain a smoother experience, but it may introduce artifacts like warping on high-contrast edges.
Fix 6) Tame reprojection artifacts (the “moving blur” nobody identifies)
If the blur appears only while moving your head or only when turning, it’s often motion smoothing/reprojection artifacts—not optics.
Step-by-step
- First goal: reduce GPU load (lower render resolution, reduce heavy graphics settings).
- Second goal: avoid unstable frame times (cap settings so the headset isn’t bouncing between modes).
- Third goal: if your platform allows it, test reprojection/motion smoothing Off vs Auto and see which looks cleaner.
Microsoft lists “expected visual artifacts” with motion reprojection like temporarily warped/distorted sharp edges or text.
Fix 7) Motion sickness settings that work (and why they work)
If dizziness is part of your VR headset blurry complaint, treat comfort settings as “training wheels” that protect your nervous system while you build VR tolerance.
Step-by-step
- Use teleport locomotion at first (then graduate to smooth).
- Switch to snap turn (e.g., 30° or 45° steps).
- Enable vignette / tunneling during movement.
- Prefer head-directed movement early on (controller-directed movement can feel disconnected).
- Take breaks at the first hint of nausea (don’t brute-force it).
Authenticity note: the turning point wasn’t “toughing it out.” It was stopping immediately when symptoms started, then returning later for shorter sessions. That pattern taught the brain “VR is safe,” instead of reinforcing nausea.
The fastest troubleshooting table (symptom → likely cause → fix)
| Symptom | Most likely cause | Fastest fix to try |
|---|---|---|
| Center never sharp | IPD mismatch or headset not centered | Fix 1 (IPD) + Fix 2 (re-fit) |
| Sharp for a moment, then blurry | Missing sweet spot due to tilt/strap | Fix 2 (tilt first, then tighten) |
| Edge blur only | Eye relief / facial interface distance | Fix 3 (pad/eye relief tuning) |
| Nausea with movement | Unstable frame timing or comfort settings off | Fix 5 + Fix 7 |
| “Ghosting” when turning head | Reprojection artifacts | Fix 6 + reduce load |
| Headaches after 15–30 min | IPD + eye strain + fit pressure | Fix 1 + loosen fit + shorter sessions |
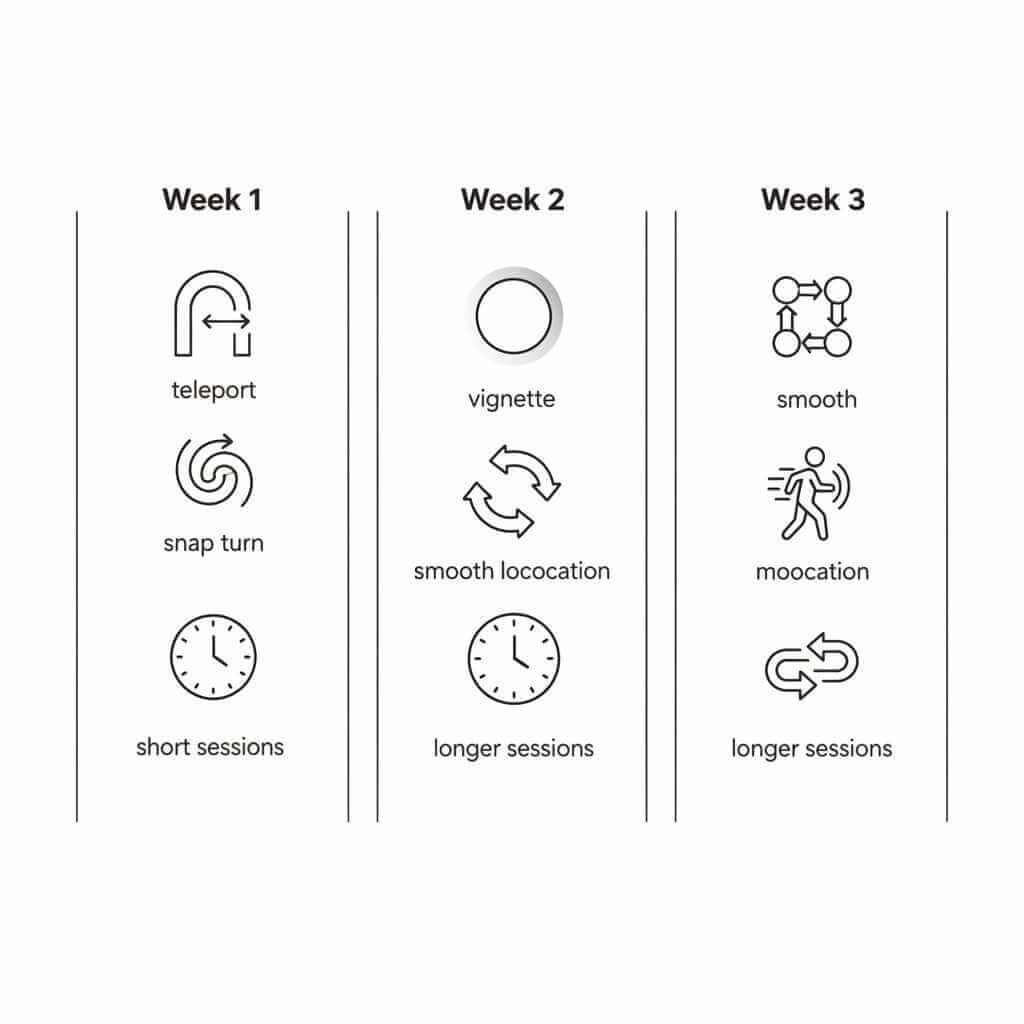
How motion sickness was reduced (a practical routine)
A repeatable routine matters more than a single “magic setting.” The most effective approach looked like this:
Week 1 (comfort-first):
- Teleport only, snap turn only
- 10–15 minute sessions
- Stop at the first nausea signal
Week 2 (controlled exposure):
- Smooth locomotion only in slow-paced games
- Keep snap turning
- Slight vignette enabled
Week 3+ (performance + tolerance):
- Remove vignette in games that feel stable
- Gradually reduce snap turning dependence
- Increase session length only when the body stays calm
What made this work was pairing comfort settings (Fix 7) with performance stability (Fix 4–6). When frames were stable and turning didn’t smear/warp, the brain adapted quickly.
Buying advice (so you don’t repeat the same mistake twice)
If you’re shopping because your current VR headsets experience feels unsalvageable, use these filters:
- Prioritize lens behavior (pancake vs Fresnel) based on what annoys you visually.
- Don’t overbuy resolution if your PC can’t sustain stable performance (stutters create sickness faster than pixels fix blur).
- If you do PCVR, pair the headset with a genuinely capable machine—Tech in Deep’s Best Gaming Laptops for 2026 guide is a solid starting point for performance class and pricing expectations.
Personal buying rule: purchase from a retailer with a painless return window. Optics are personal—two people can try the same headset and have opposite comfort outcomes.
FAQ: VR headset blurry fixes
Q1: Why is my VR headset blurry even when the headset is “new”?
A new headset can still look blurry if your IPD isn’t aligned, you’re missing the lens sweet spot, or your eye relief (face pad distance) is off. In other words, it’s often setup—not a defective device.
Q2: What does “IPD” mean in VR, and why does it matter?
IPD is the distance between your pupils, and mismatched IPD can cause blur, eye strain, headaches, or a “can’t fuse the image” feeling. Correct IPD alignment is one of the fastest fixes for a VR headset blurry experience.
Q3: How do I know if my blur is an IPD problem or a fit problem?
If one eye looks sharper than the other, IPD is a strong suspect. If clarity comes and goes when you slightly shift the headset up/down or tilt it, you’re likely missing the sweet spot due to fit/strap positioning.
Q4: Why does everything look sharp for a moment, then go blurry again?
That pattern usually means you briefly hit the lens sweet spot, then the headset shifts out of it due to strap tension, top strap length, or tilt. Re-fitting (tilt first, then tighten) typically stabilizes clarity.
Q5: What is the “sweet spot” in VR lenses?
The sweet spot is the lens alignment zone where clarity is highest, and small position changes can make text blur instantly. When the sweet spot is small or your fit is unstable, you end up constantly re-positioning the headset.
Q6: Can pancake vs Fresnel lenses affect perceived blur?
Yes—lens design affects clarity behavior, glare/artifacts, and how sensitive the headset feels to positioning. The article explains Fresnel lenses can be more prone to artifacts like chromatic aberration and require distortion correction, while pancake optics fold the optical path to enable slimmer designs (with tradeoffs).
Q7: Why does my VR headset look blurry mainly when I turn my head?
If blur shows up mostly during head movement, it’s often reprojection/motion smoothing artifacts rather than optics. This can look like smearing, wobble, trails, or warping on edges when performance can’t hold the target frame rate.
Q8: Should I increase resolution to fix a VR headset blurry image?
Not immediately, because raising resolution can trigger stutters, reprojection, and nausea if performance becomes unstable. The recommended approach is to lock stable performance first, then increase resolution in small steps and roll back if discomfort increases.
Q9: What refresh rate should I use to reduce dizziness?
A refresh rate only helps if your system can sustain it consistently in gameplay, not just in menus. If you notice shimmer/ghosting while turning, lowering settings to maintain stable motion can be more comfortable than chasing higher refresh targets.
Q10: How can I reduce VR motion sickness fast?
Use comfort settings as training wheels: teleport locomotion at first, snap turning, vignette/tunneling during movement, and breaks at the first hint of nausea. A gradual routine (short sessions first, then controlled exposure, then longer sessions) helps build tolerance without brute-forcing it.
Conclusion (key takeaways + next step)
A VR headset blurry problem is usually fixable without buying new hardware: align IPD, hit the sweet spot, correct eye relief, then prioritize stable performance and comfort settings over raw resolution. If dizziness is involved, treat it as a system mismatch (optics + frame timing + movement settings), not a personal weakness.
Next step: try Fix 1 and Fix 2 today (they solve the majority of cases), then comment or message with your headset model + whether you’re on standalone or PCVR—those two details determine the best resolution/refresh/reprojection strategy.