Table of Contents
How To Make Moving Image On Your Phone
Today we are going to learn how to make moving images on your phone. Capturing a moment is an amazing thing. But, what if you could animate your perfect picture? Imagine if you could add a movement to a stationary moment in time. How cool would that be?
What if you had a picture of a waterfall. It would be awesome, if the waterfall had motion, while everything else around it, stood still. Or imagine a sunset. Animating part of the picture would add a completely different dimension, to an already beautiful composition.
Use this tutorial, to create amazing moving images, and boost your social media game. Impress your friends with your photography and editing skills.
Although there are plenty of photo editing apps that makes it possible to create moving images, we will focus on only one.. Pixaloop.
Pixaloop is a free app hosted on Google Play, but it can also be found on Apples App Store. It allows the users to make live photos, wallpapers and GIF animated effects. It brings static images to life, by using their state of the art photo animator. Combine that with an intuitive and easy to use interface, and you got yourself a hit app.
But enough talking about this application, let’s put it to a test.
Install Pixaloop
You can get Pixaloop on Google Play Store or Apple App Store. This demonstration is done on Android smartphone, so I will be downloading and installing it, from the Play Store.

TechInDeep News:
Choosing an Image
Like with any other image editing app, you start by choosing an image. But, there is also an option to open your camera and snap a new photo. I leave that decision up to you. Sometimes, it is fun creating moving images on the go. For the sake of the tutorial, I will be choosing a photo from my gallery.
It’s an image I have previously downloaded on my phone.

This is an awesome picture. We are going to be using it to demonstrate how to make moving image using your phone.
Create a Moving Image on Your Phone
When you launch Pixaloop it looks something like this
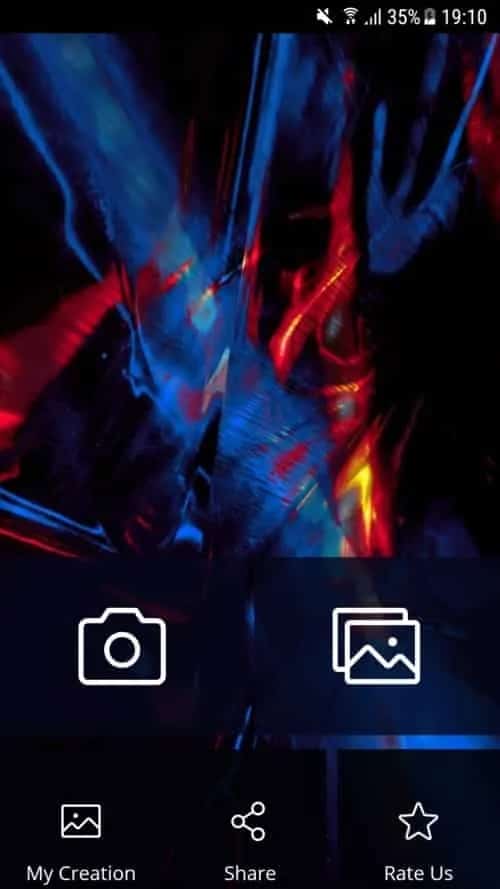
You can animate your image two ways. Either use your phone camera and snap a new one, or import an existing image. I will import mine.

The first screen allows you to crop the image, before you apply the animation effect. Depending on where you want to publish your work, its a good idea to crop it beforehand. For me personally, this works quite nice. I won’t be doing any cropping. Will go straight to making a moving picture.
Moving Image Tutorial
What I envision for this image is a falling waterfall, while the subject stood still. I think by adding a motion to the background, this image will get a whole new dimension.
Masking the subject

First of all, you need to tell the application what is a static object. In my image, there is a girl right in front of the waterfall. So, I don’t want the moving animation to affect her. On the bottom of the screen there is a MASK button. It allows you to set the size of the brush and paint over the area you want static. It doesn’t have to be perfect, but make sure the mask contains your static subject.
Masking the background

I continued my masking process to the background as well. Well at least part of it. I also do not want the ground to move. It doesn’t look good on the moving image. It’s just not natural. You do this process by trial and error. Do your changes, then press the Play button. If you are happy with the result, then move on to the next stage. If not, go back and fix everything you do not like.
Animating the Waterfall

For this image, I chose to use Motion Animation. You can activate it by clicking the Motion button on the bottom of the screen. When this setting is active, you can tell the application the path of the animation. As you can see I have created six paths, all pointing in a downward direction. I am mimicking the path that a waterfall would naturally take. If you want, you can make the waterfall move up as well.
When making a moving image using this tool, the final result would animate everything in a downward motion. And I mean everything. After playing my clip I noticed that the top and bottom are also dragged down. To solve this issue I used Anchor Points.
You can see seven anchor points right above my ground mask and five anchor points on top of the image. This prevents weird ground and top movements on the image. After a couple of tries, moving and adding anchor points I was satisfied with the result.


MAKECOMMENT