Table of Contents
How to Transfer Files from an iPhone to Windows PC
Do you have an iPhone cramming up with excessive data that there is no storage space left for more? In such circumstances, you will need to transfer files from your iPhone to a supported device. If you do not own a Mac by chance, you will have to go by with Windows PC.
To transfer iPhone files to a PC, you will need a proper understanding of the methods involved with it. This article provides insight into how you can transfer important data from your iPhone to a Windows computer with the right techniques.
Part 1: Transfer iPhone Files to PC with iPhone Transfer Software
If you tend to go for general techniques as a first choice, you will find them restrictive in terms of transferring files to the PC. For proper file transfer, you must use an appropriate iPhone transfer software that makes the process simpler for you. There are many tools available in the market providing services of iPhone data transfer, but not all of them are known for featuring distinctive approaches to transferring iPhone files to a PC.
EaseUS MobiMover is a free iPhone transfer software that helps you in transferring data from one iPhone to a PC or another iPhone. Known for its simplicity and versatility, EaseUS MobiMover provides some of the finest and most professional functionalities necessary for iPhone transfer software. The provisions covered by this tool make it a great alternative to iTunes in the market, where you are not even required to pay any fee.
For iPhone files that are mistakenly deleted from your device, you can easily recover them with the help of another cohesive tool named EaseUS MobiSaver. Such utility tools never tend to disappoint the user in helping them manage their data proficiently.
Features That Highlight EaseUS MobiMover
As the iPhone transfer tool serves a great purpose of managing iPhone data under a single click, it is necessary to be aware of some prominent features that make the tool special in the market:
• Similar to iTunes, EaseUS MobiMover provides a simplistic procedure for backing up data at any time that you wish to.
• You can easily back up and transfer iPhone files to a PC with a single click, with no additional catch involved.
• From photos to videos, along with other data such as contacts, messages, audio, and much more, EaseUS MobiMover helps backup and transfer all aforementioned types of data.
• There are three distinct ways available for transferring data from the iPhone using this tool.
• Provides a dedicated WhatsApp Manager for backing up and restoring WhatsApp data of the iPhone separately.
Steps to Transfer All Files from iPhone to PC
We will now see how to transfer iPhone files to a PC with the efficient toolkit provided by EaseUS MobiMover. Look through the application to know more about how the transfer can be executed with ease and care:
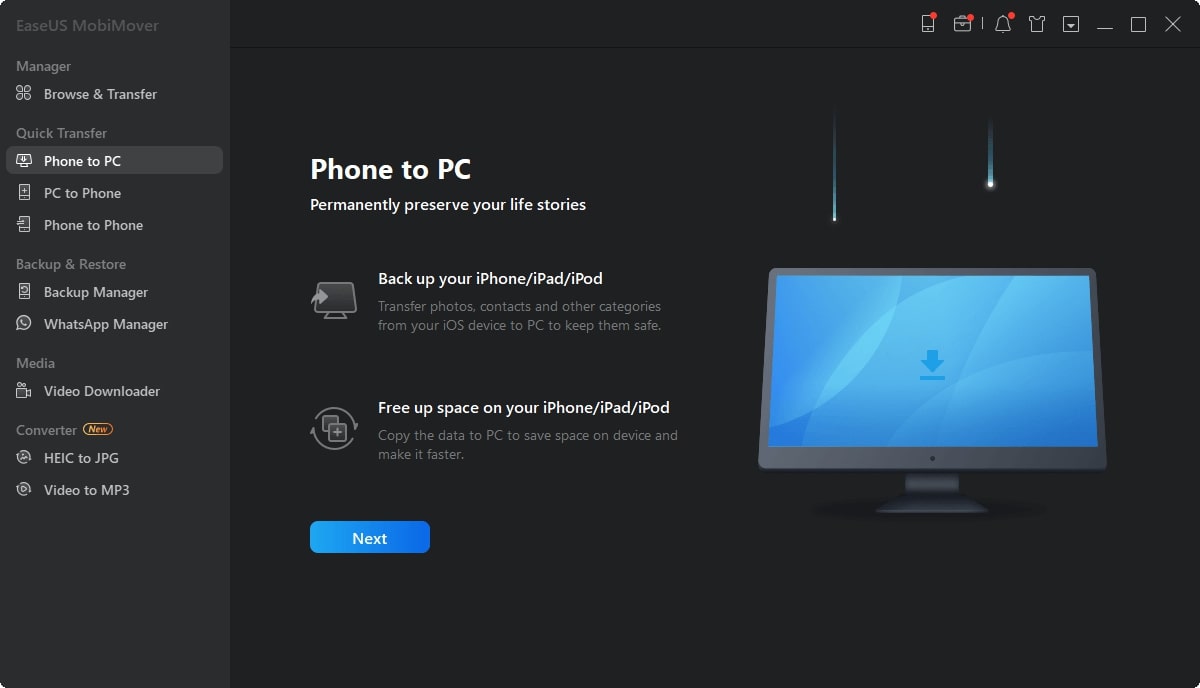
Step 1: Connect iPhone and Access Mode
You must connect your iPhone to the Windows PC and proceed to “Trust” the device by selecting this option on the iPhone. Launch MobiMover on your Windows computer and select “Phone to PC” from the left panel. As you access the respective mode, click the “Next” button to continue.
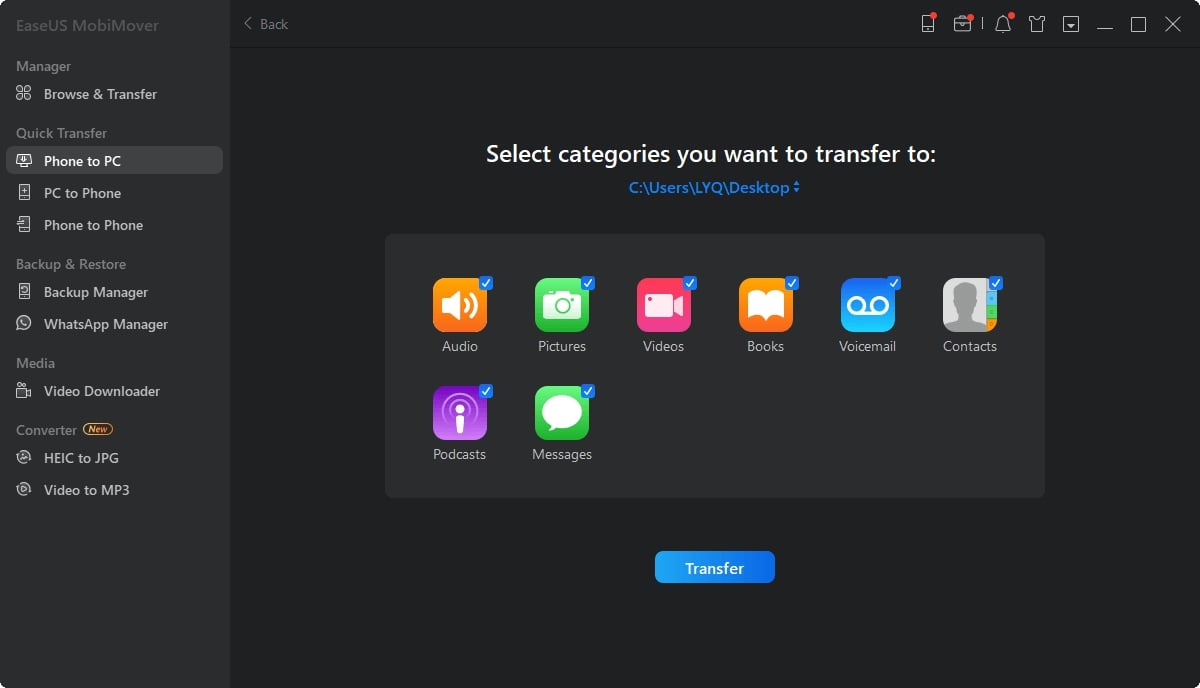
Step 2: Initiate Transfer of Data
Following this, you will have to checkmark the type of data that you wish to transfer to your computer and tap on the “Transfer” button. Define the location for the transferred data before you initiate the transfer process.
Step 3: Conclude and Check Transferred Data
The process will take a while to conclude, which can then be previewed easily in the respective folder where the data has been transferred.

Steps to Transfer Specific Files from iPhone to PC
If you have a specific set of data that you wish to take out from your iPhone, you must follow this procedure for better and controlled results:
Step 1: Select Mode to Transfer
Start by connecting your iPhone to the PC and proceed to launch EaseUS MobiMover on your computer. Redirect to the “Browse & Transfer” option from the left panel and select a specific file type on the window.
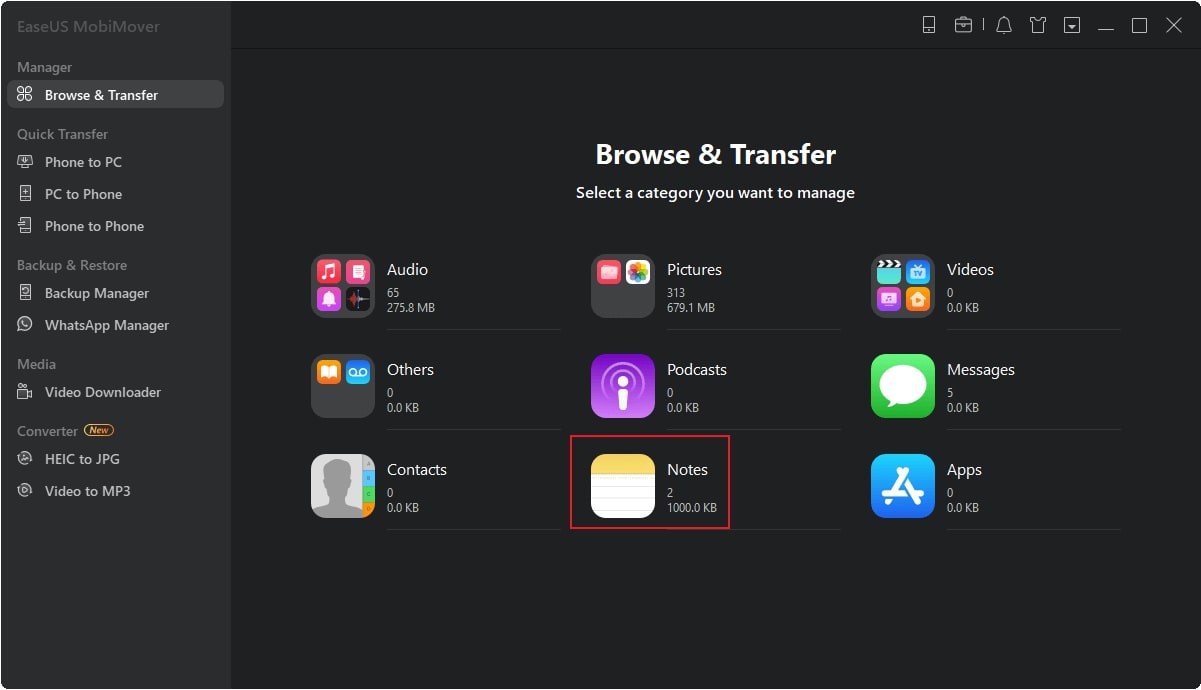
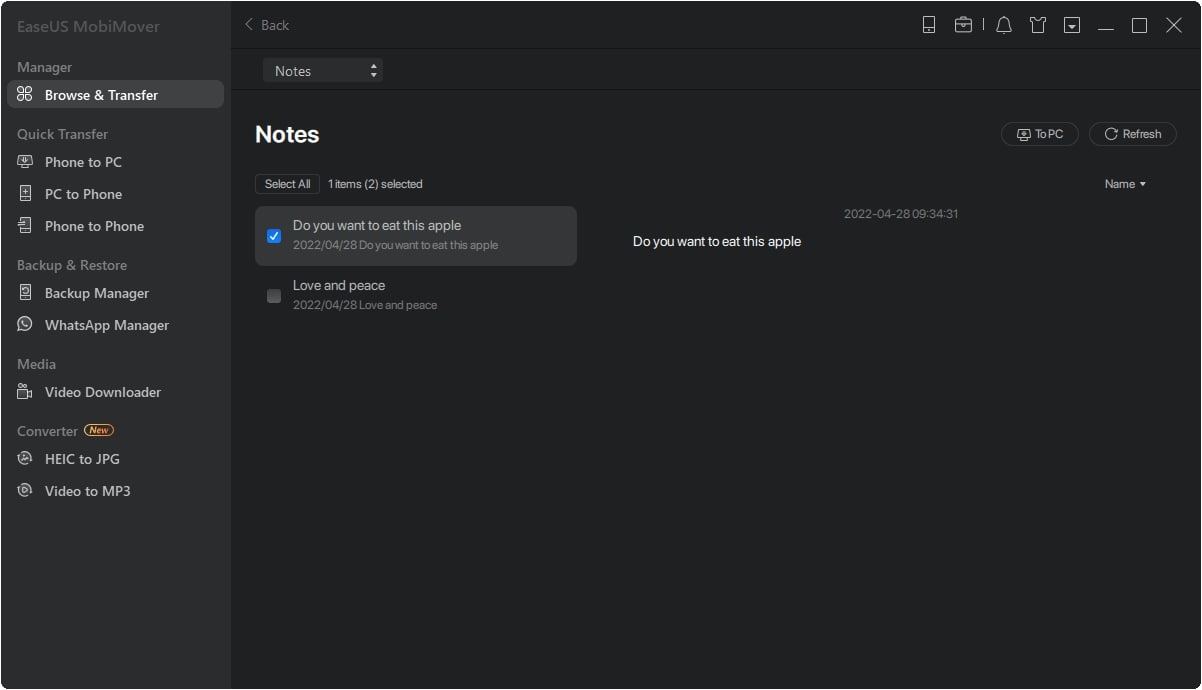
Step 2: Select Specific Files
As you are directed into the file details of a specific file type, for instance, “Notes,” select the files individually and tap on the “To PC” button on the top-right.
Step 3: Transfer Specific Data to Computer Successfully
This will help you transfer specific and individual files from the iPhone to the PC. The process will take a while to conclude, which can then be easily viewed across the respective folder where it is transferred.

Part 2: Transfer iPhone Files to PC via iCloud Service
iCloud service can be a direct source of transferring iPhone files to a PC; however, this process requires a set of steps that must be followed. Talking about the operability of this technique, it is entirely possible, but the user needs to understand different things in this. To know better what is required to transfer iPhone files to a PC through iCloud service, look ahead in the steps:
Step 1: If you are not having iCloud installed on the Windows PC, look for the application and install it successfully. Launch and sign in with your Apple ID. Following this, you will have to specify the features on the next screen and proceed by clicking “Apply.”

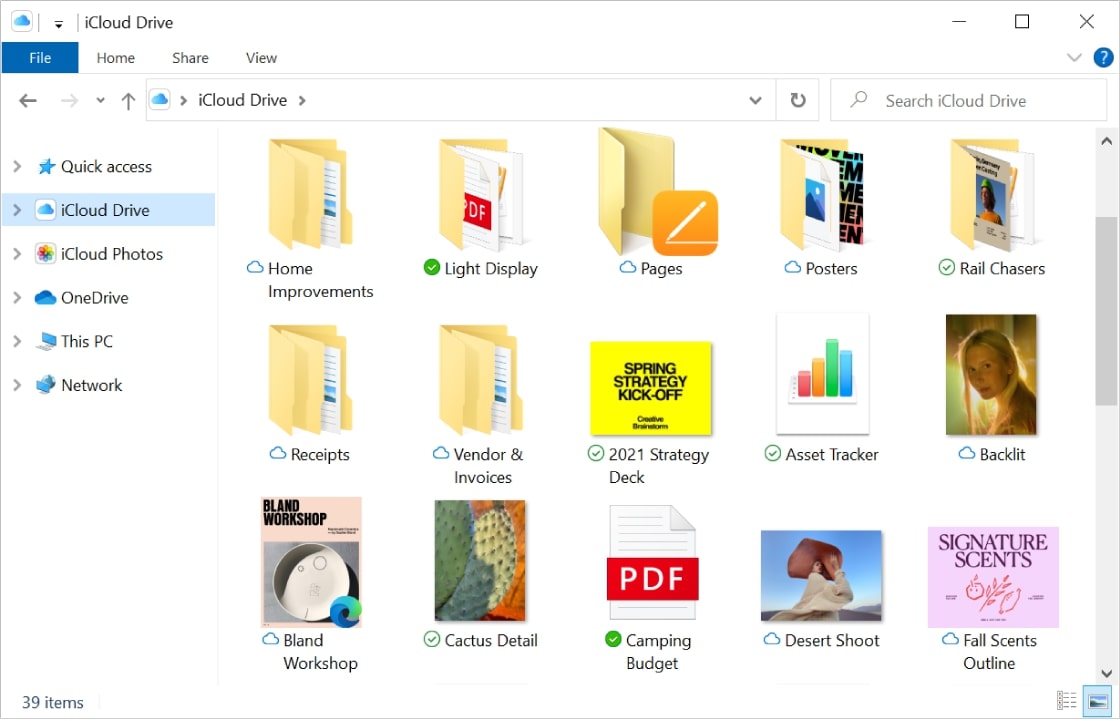
Step 2: Next, you must move into the “Settings” of your iPhone and tap on the name at the top. Select the “iCloud” option on the next screen to find the option of “iCloud Drive” to enable its toggle.

Step 3: Following this, reaccess your PC to open File Explorer from your Desktop. Find the “iCloud Drive” folder in the left panel and select the files to download to your PC.
Part 3: Transfer iPhone Files to a PC with a USB Cable
One of the most straightforward approaches available to transfer iPhone files to a PC exists in a USB connection with a Windows computer. This process is easy, but it is restricted by the data it transfers. Using this process, you can only transfer your photos to the Windows PC without hindrance. If you wish to know the operations of this method, look through the simple steps provided next:
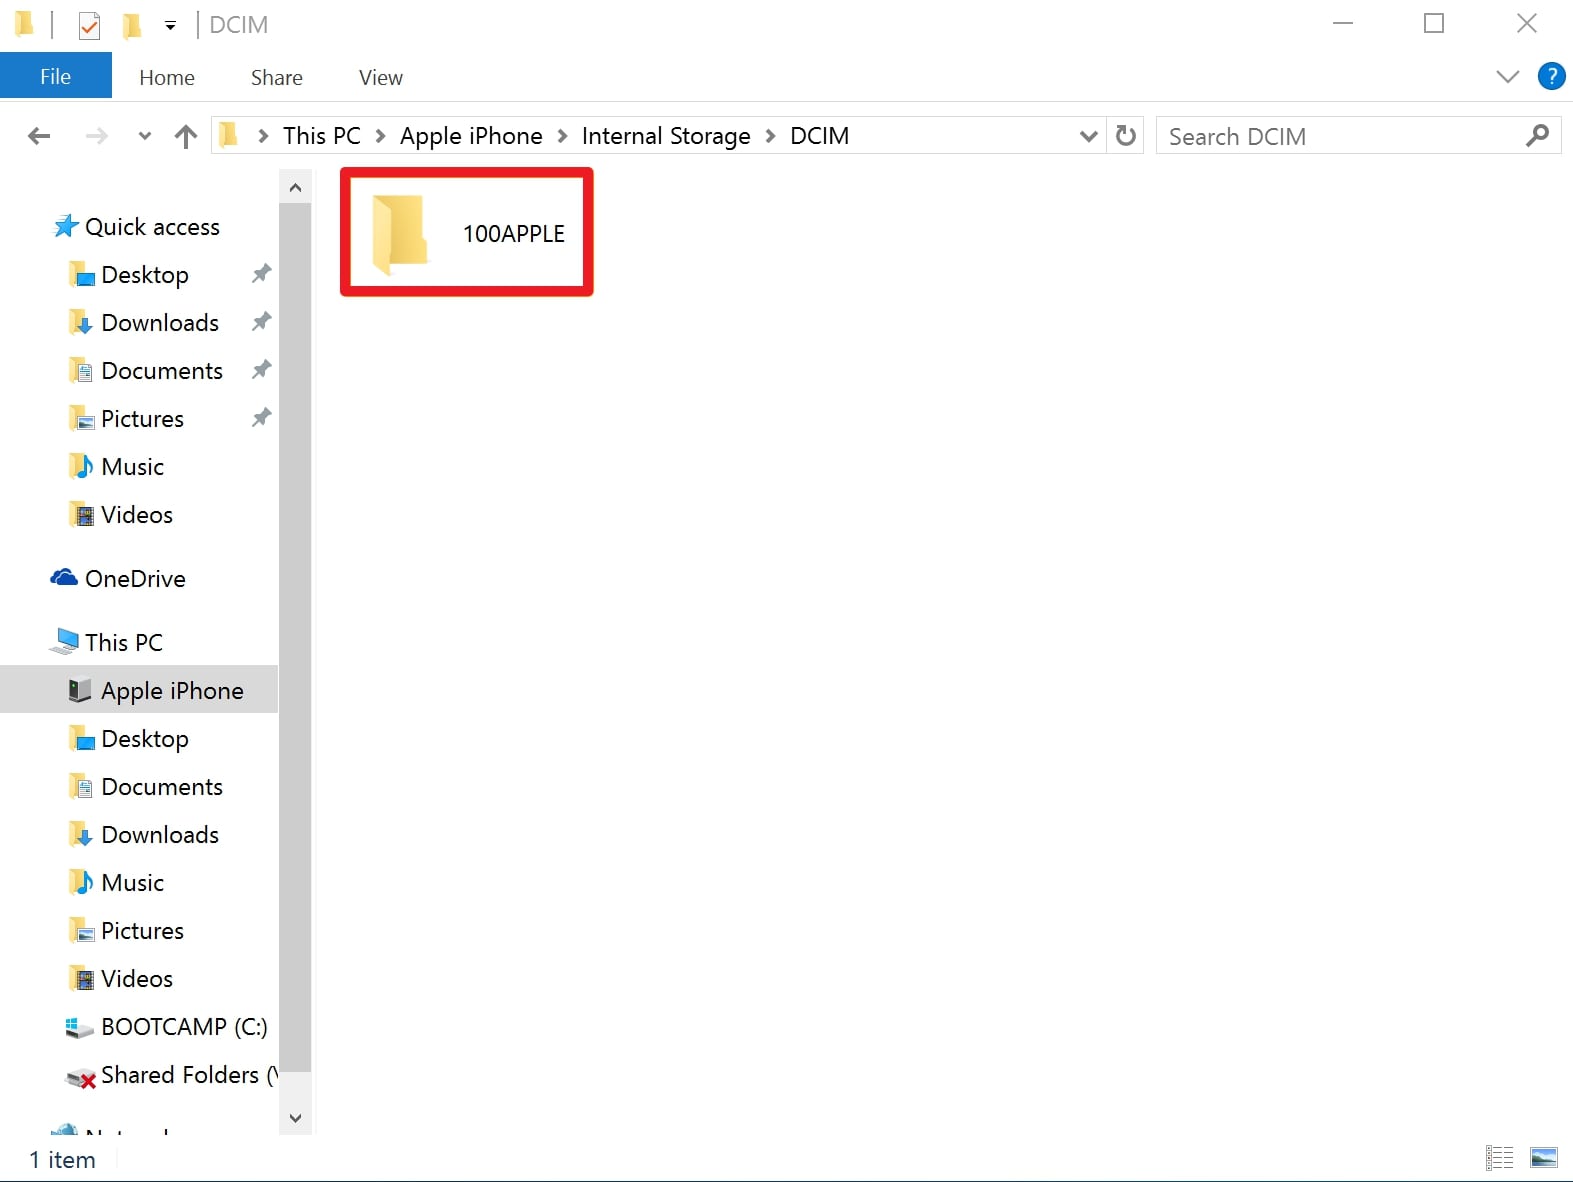
Step 1: Start by connecting the iPhone to the Windows computer through a USB connection. As you connect it and the device is initialized by the Windows, you must click on the “Trust” option on the iPhone’s screen.

Step 2: Following this, open “File Explorer” and find the respective drive representing the iPhone. Proceed into the folders to locate all the images that can be easily copied and pasted onto the computer.
Final Words
This article has provided some clear insights on how to transfer iPhone files to a PC with the help of different methods. With techniques such as EaseUS MobiMover, you can have absolute results in transferring all types of data to your Windows computer. Along with that, try other methods if you are not having access to the best option at the moment.
Read More: Windows 10 End of Life Support: Everything you need to know


MAKECOMMENT