Turn a photo into an AI video for TikTok, and you can try a fresh content idea without filming anything new. That’s the shortcut I wanted to test using pictures already saved on my phone.
Creating content consistently takes work. Every post needs an idea, suitable footage, and an edit worth watching. Finding time for that between other responsibilities isn’t always easy.
My camera roll offered a starting point: travel photos, portraits, and forgotten pictures that might work as short animated clips. This guide covers choosing a suitable image, directing its movement using APOB AI, and finishing the result for TikTok on Android or iPhone.
My goal is a usable video—not a promise of viral success. You’ll still need to review the output, shape the edit, and decide whether the result deserves a place on your profile.
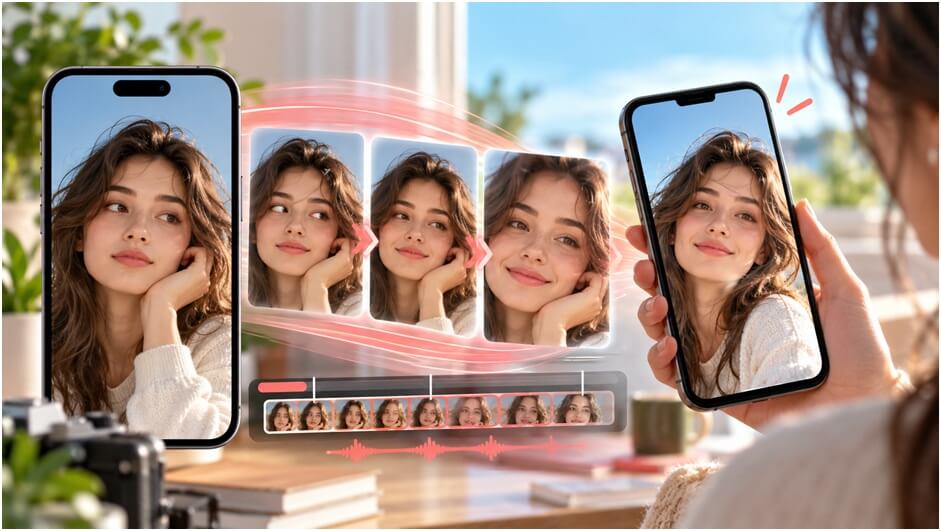
Table of Contents
My Goal: A TikTok Video Without Another Filming Session
Finding time to create fresh content can be difficult, but I already have plenty of travel photos saved on my phone. I wanted to give a few of those pictures a second use: short animated clips that don’t require another filming session.
For this project, my checklist is simple:
- Start from an existing phone photo.
- Keep the subject recognizable.
- Generate believable movement.
- Add text and audio where useful.
- Prepare a finished clip for uploading.
Almost any image-to-video documentation describes this starting point: an uploaded image acts as your first frame, and a written description directs its movement.
Use APOB AI Image to Video to animate the selected first frame, but approach the first result as a draft. If you generate alternatives, change one meaningful variable at a time:
- Keep the image and action constant; change the opening camera move.
- Keep the camera constant; compare a neutral expression with a surprised expression.
- Keep the visual constant; test two caption hooks later in the editor.
This makes it possible to understand why one version feels clearer. Randomly changing the subject, motion, lighting, background, length, and copy creates variety without learning.
That makes APOB a relevant tool for this tutorial, not an automatic winner over every alternative. I’d judge any generator against the same questions: does the output look convincing, how much correction does it need, and is the result worth its credit cost?
What You Need to Turn a Photo into an AI Video
| Item | Purpose | Quick tip |
|---|---|---|
| A clear photo | Supplies the starting appearance and composition. | Use the original file rather than a screenshot. |
| An image-to-video tool | Generates movement from your uploaded image. | Check mobile access, output options, and credit costs. |
| The TikTok app | Provides editing and posting options. | Review the finished clip before publishing. |
| An opening idea | Gives viewers a reason to watch. | Draft your opening text before generating. |
No desktop software is central to this workflow. AI handles the animation, and you can add finishing touches on your phone.
Available settings and button labels can vary according to your account, selected mode, and device. Check the options shown in your interface before generating.
Choose a Phone Photo That Gives AI a Fair Chance
Before worrying about prompts, spend a minute choosing your source image. My temptation is to pick a favorite photograph immediately, but a better question is whether that picture suits the movement I want.
A portrait might suit a slight expression change. A landscape might suit drifting clouds. Asking either image to support a complex action creates a different challenge.
Photos Worth Starting From
For a first attempt, I recommend a photo containing:
- A sharp, clearly visible subject.
- Lighting that leaves important details visible.
- Some space around the subject.
- A background that is easy to interpret.
- A pose suited to the intended movement.
Blurry screenshots, tightly cropped portraits, overlapping people, and partly covered faces deserve extra caution. Treat these as selection guidelines rather than fixed rules; results vary across generators.
A simple portrait or travel photo gives you fewer details to inspect than a crowded group shot. That makes judging your first result easier.
Prepare Your Image Before Uploading
Open your phone’s photo editor and save a separate cropped copy. Use a vertical composition suitable for your intended post, leaving room around faces, hands, and important objects.
Check the background for addresses, documents, vehicle plates, or other private details before uploading.
Use a photograph you own or are permitted to process and publish. If other people appear, consider whether you have permission for the intended use. TikTok’s AI-generated content rules include restrictions concerning likenesses and consent, so review them before publishing realistic AI depictions.
Step 1: Upload Your Photo to APOB AI
Open APOB AI TikTok video generator through your phone’s browser, sign into your account, and find Image to Video.
According to its documentation, Upload image accepts your own file, whereas Select content lets you choose existing content. For this walkthrough, select the prepared photo from your camera roll.
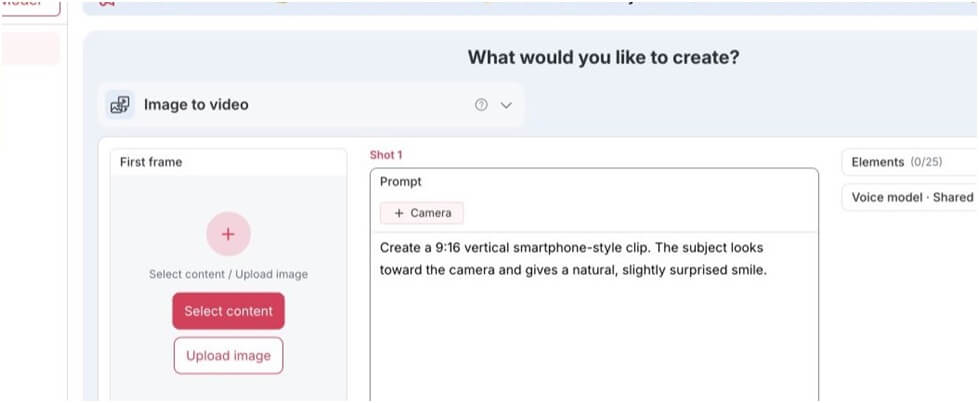
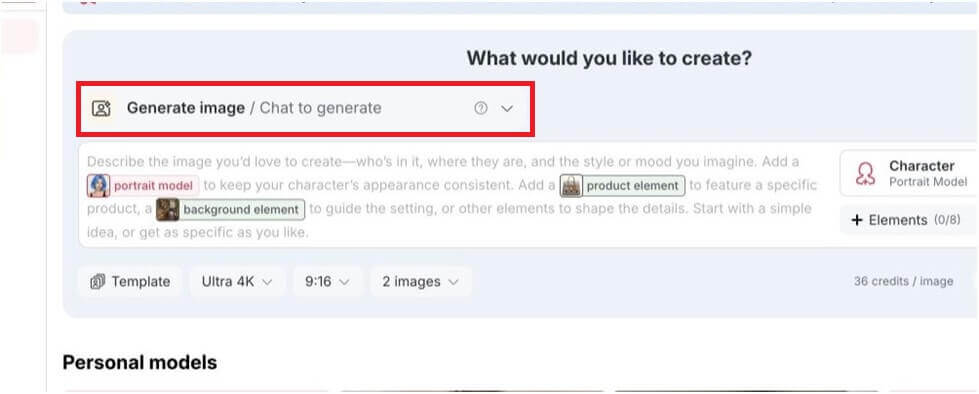
If APOB opens in Generate image mode, use the mode selector to switch to Image to video before uploading your photo.
Check Your Starting Frame
Confirm that the preview shows the correct image and includes everything needed for your intended action.
You can also select an optional ending image. I’d skip that during an initial attempt unless reaching a particular ending is central to the idea.
If you use both frames, choose images that belong to the same scene and suggest a plausible transition. Treat the ending frame as extra guidance, not a guarantee that every frame between them will look convincing.
Android and iPhone Notes
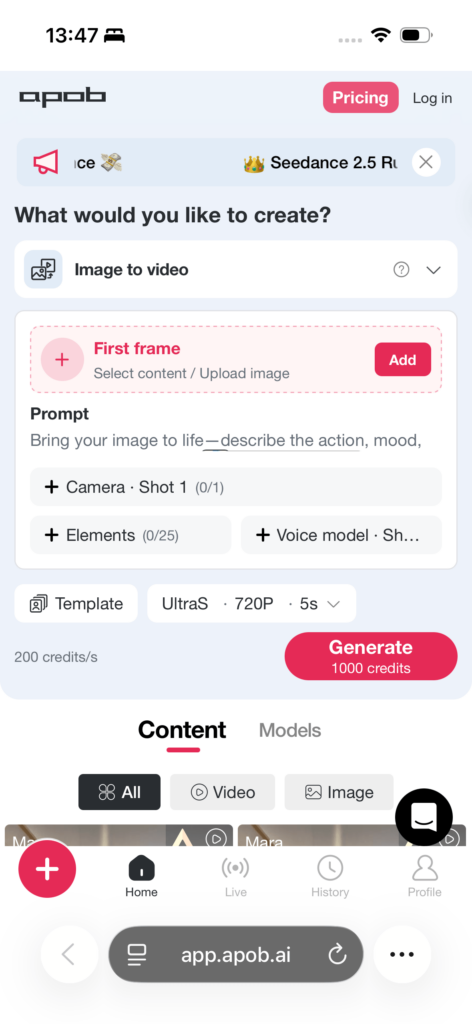
Your browser may open a photo picker or file chooser. Follow your device’s permission prompts and select the prepared image.
APOB documents a mobile layout, but don’t assume every phone displays identical menus. Look for the source-image, description, duration, quality, and resolution controls available in your selected mode.
Step 2: Write a Prompt for Believable Movement
My advice is to begin with a single action. A blink, smile, coffee sip, and moving camera might sound like a simple scene, but that’s several separate requests competing for a few seconds.
After trying the software a few times, I found that the prompt mattered more than I initially thought. Asking for a specific movement gave me a clearer direction than simply writing “animate this.”
Describe the Action Instead of Rewriting the Photo
Your uploaded image already supplies the subject and setting. Use the description to explain how that picture should move and which details should stay consistent.
For a restrained portrait animation, try:
The person blinks gently. Keep the camera fixed and preserve the face, clothing, and background.
For a landscape, try a separate instruction:
Clouds drift slowly toward the left. Keep the camera fixed and preserve the landscape.
These are starting prompts, not guarantees. Review what the selected model produces before adding complexity.
Treat Camera Movement as Another Action
If camera movement is the point of your clip, keep the subject’s action simple. Try wording such as “slow camera move toward the subject” rather than combining a pan, orbit, and zoom.
My starting choice would be a fixed camera and subtle subject movement, or a gentle camera move around an otherwise still subject.
Change a Single Instruction at a Time
If a smile looks strange, remove that request before rewriting everything else. If the camera distracts, try a fixed view.
Changing several instructions together makes comparison difficult. Save useful prompts and brief notes on your phone so you don’t repeat unsuccessful attempts.
Check whether your selected mode supports written descriptions before spending credits.
Step 3: Check Settings, Credit Costs, and Generate a Short Clip
Before pressing Generate, check the available duration, quality, resolution, and quoted credit charge.
For an initial trial, I recommend a short clip so you can review the direction before committing to a longer output.
Watch Your Credits Before Retrying
When you turn a photo into an AI video, each retry may consume credits—even if the result isn’t usable. Set a small budget and check the displayed charge before submitting another request.
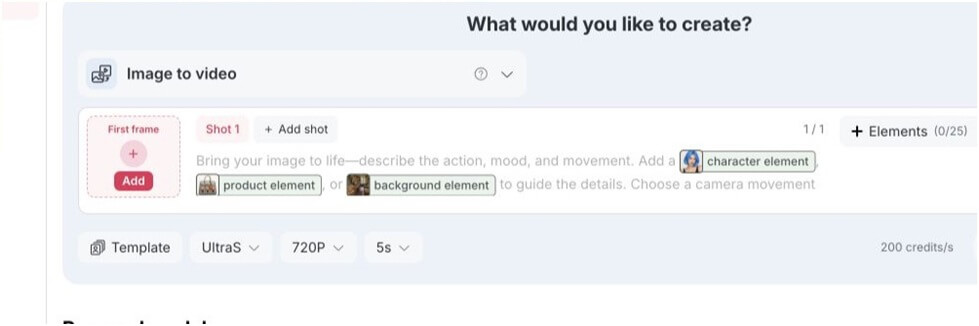
If something looks wrong, pause. Review the source photo, simplify the movement, or adjust a specific instruction instead of repeating the same request without a plan.
APOB’s documentation describes per-second pricing that depends on settings and plan details. Check your current account rather than assuming that free access means unlimited generation.
Review Details Before Accepting a Result
Watch the full clip and pause around suspicious movement. Check:
- Eyes, teeth, and facial consistency.
- Hands and fingers.
- Clothing edges and patterns.
- Background lines and nearby objects.
- Sudden changes near the ending.
A higher-resolution export won’t automatically repair unnatural movement. Judge sharpness and visual consistency separately.
Generated Example: Animating the Lake Photo
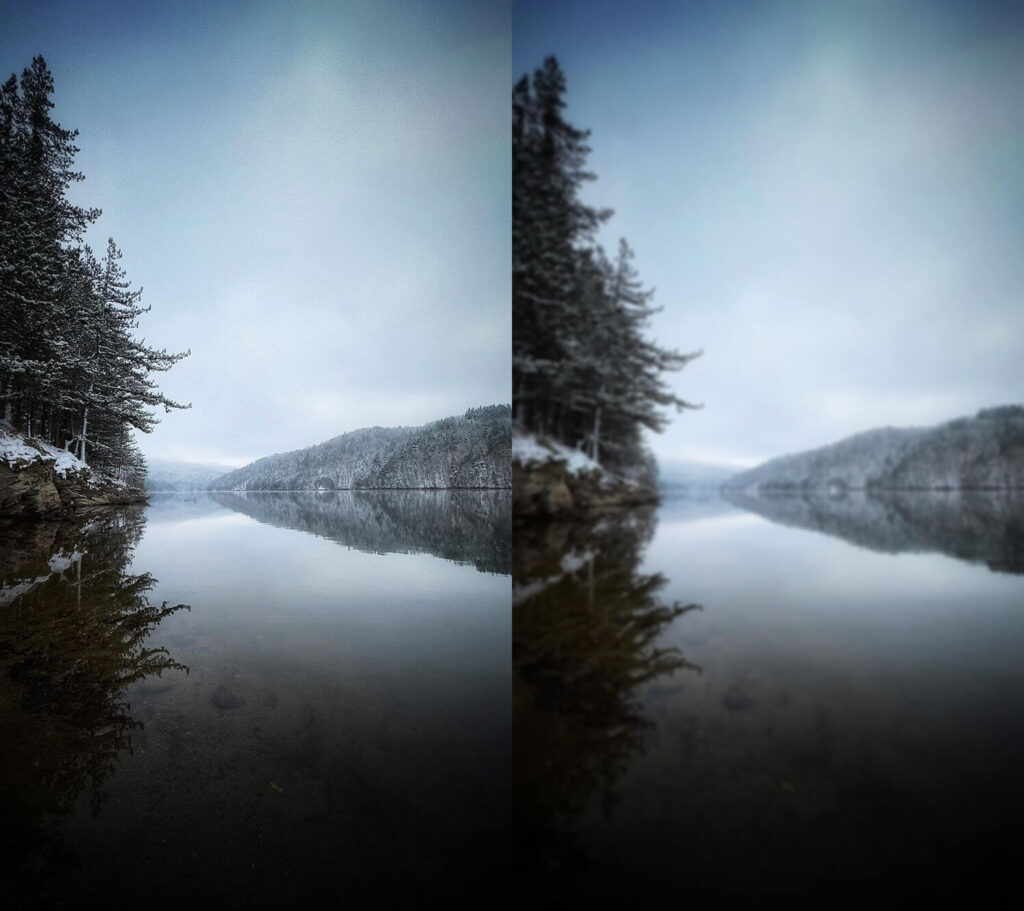
I chose a snowy lake photo for this example rather than uploading a portrait of myself. The animation brief was deliberately restrained: gentle water ripples, subtle changes in the reflections, and a fixed camera.
AI-generated animation based on the original lake photo.
The prompt requested gentle water movement while preserving the winter scene.
Compare the clip with the original photo shown earlier. Watch the shoreline, tree shapes, and reflections throughout playback. Does the movement complement the picture, or do unwanted changes distract from it? That’s the check I recommend before accepting a generation or spending credits on another attempt.
Mistakes That Can Leave AI Videos Looking Fake
An imperfect result doesn’t always require a different tool. First check whether the photo, requested action, or camera direction is creating unnecessary difficulty. These adjustments are suggestions to test, not guaranteed repairs.
| Mistake | What you will see | How to fix it |
|---|---|---|
| 1. Starting from a blurry photo | Soft or inconsistent facial details. | Try a sharper original. |
| 2. Requesting excessive action | Warping or abrupt pose changes. | Reduce the request to a small movement. |
| 3. Combining camera moves | Distracting zooms or unstable framing. | Use a fixed camera or a gentle move. |
| 4. Choosing an unsuitable action | Invented body details or stretched clothing. | Match the movement to the source pose. |
| 5. Giving conflicting instructions | Inconsistent movement or ignored requests. | Simplify the prompt and remove contradictions. |
| 6. Using overlapping subjects | Merged details or confusing movement. | Try a simpler composition. |
| 7. Skipping a full review | Brief distortions remain in the post. | Inspect, trim, or regenerate. |
| 8. Treating resolution as a realism fix | Sharper output that still moves unnaturally. | Address the source image or motion request. |
Step 4: Finish Your Clip for TikTok
Save your chosen output to your phone and check that the downloaded file plays correctly before editing.
Add a Reason to Watch
For this project, my opening text could read:
This started as a forgotten photo on my phone.
Show the original picture briefly, then reveal the animated version. That gives viewers context without pretending the generated movement was filmed.
Choose Audio and Text Deliberately
This application supports native audio in compatible modes, so check what your selected option produces before adding another soundtrack. If you add audio during editing, check that its permitted uses fit your account and post.
Keep text concise, add captions when speech needs them, and preview placement inside TikTok so interface controls don’t obscure your message.
Build a Longer Edit From Usable Short Clips
I wouldn’t stretch a flawed generation just to reach a longer runtime. Start from a clip that holds up, then decide whether to extend it or combine it with another shot.
An original photo, animated reveal, and closing caption can give a short post a clear beginning and ending without asking the generator to invent an entire sequence.
Try TikTok AI Alive as a Built-In Alternative
TikTok introduced AI Alive through its Story Camera as a way to animate photos using movement and creative effects.
Its documented destination is TikTok Stories. Keep that distinction in mind if your goal is a standalone clip for a regular video post.
Find AI Alive Through Story Creation
TikTok’s published instructions describe this route:
- Open Story Camera through the blue plus on your Profile or Inbox page.
- Select a photo.
- Look for AI Alive on the photo-editing toolbar.
- Create and review the animation before posting.
Treat this as the documented access path, not a guarantee that your account displays identical controls. TikTok states that AI Alive Stories receive an AI-generated label and metadata identifying their AI origin.
Step 5: Upload and Check AI Disclosure
For an externally generated clip, open TikTok’s posting screen, upload the saved video, choose a cover, and review your caption and settings.
A suitable caption could explain the process:
I tried turning an old phone photo into a short AI video. Would you keep the subtle movement or try a different effect?
Label Realistic AI Content
TikTok requires labels for AI-generated content containing realistic images, audio, or video. Its AI labeling guidance explains the disclosure options and restrictions.
Check the additional posting options for the AI-generated content setting. Disclosure doesn’t grant permission to impersonate someone or publish otherwise prohibited material.
Check Commercial Rights Before Using Your AI Video
If you plan to turn a photo into an AI video for a sponsored TikTok, advertisement, or client project, check whether your chosen tool permits commercial use.
Read its terms and your subscription details. Look for output ownership, plan restrictions, conditions attached to free credits, and any permission the provider retains to reuse your content.
For this walkthrough’s tool, review APOB’s Terms of Service alongside your account’s current conditions.
Your source material needs permission, too. A generator’s commercial-use allowance doesn’t automatically clear rights to photographs, recognizable people, music, or other protected material.
If the terms are unclear, describe your intended use to support and request written confirmation. Keep that response alongside your source-image permissions and relevant licenses.
Does This Reduce Content-Creation Work?
For me, the appeal is avoiding a fresh filming session for every idea. Existing photos offer a starting point when time, location, or lighting makes filming inconvenient.
Creative decisions still remain: choosing the image, directing movement, reviewing attempts, and preparing the post. Count that active work when judging how much time the workflow saves.
I wouldn’t call this an automatic influencer routine or describe a result as viral without viewing data. A useful test measures effort, credit spending, rejected attempts, and whether the finished clip feels worth publishing.
Frequently Asked Questions
Can I Turn a Photo into an AI Video for Free?
Check the tool’s current allowance. APOB documents a free-user starting setting, but credit availability, output choices, and download conditions need checking inside your account.
Can I Use an Old Camera-Roll Photo?
Yes, provided you’re permitted to use it. Choose the clearest available file and movement suited to its composition.
Does This Work on Android and iPhone?
APOB documents mobile image-to-video controls. Browser permissions, downloads, and saving steps can differ across phones.
Start From Your Camera Roll
Choose a suitable photo, request restrained movement, inspect the result, and finish the clip deliberately. Test a simple idea before spending credits on longer or complicated generations.
Pick a photo today and write a short motion prompt. Then judge the result against a straightforward question: would you enjoy watching this if somebody else posted it?
Turn a photo into an AI Video
And this is just the beginning. In the next few posts I will be trying out cutting edge tools compare and rank them, so that I can give you the best advice in which one to use.
So, stay tuned.